Color tone scanning with ditial cameras
Re-mixing an existing colortone can be quite an exercise for the untrained eye. Especially annoying is the factOnce
that the original color tone and the newly mixed color can seem quite equal if you have it separated (e.g. the original
color on the wall and the new color still in the mixing pot).
Once you bring the two colors next to each other you will find remarkable differences in color tone and brightness. This is even worse if you first compared the colors under artificial light (which has a different spectrum than sunlight and might distort the color perception) or LED light (which is composed from single spectrum peaks. A good practice is to paint (and let dry) the new color tone painted next to the original one. This makes the comparison easier since it is independent of the different lighting situation at different locations. When the color tones are already in good coincidence it might be very hard to determine the missing color to match the original tone completely. This is the point where you normally loose patience and take (if you have the chance that the original part is portable and not a wall or car frame) the original color sample to a color mixing service which scan and automatically remix your color tone. If you can not bring the sample to the color shop you normally have to rent an expensice mobile color scanner device and buy the closest matching tone from the manufacturer of the scanner device. There is also the chance that your sample is too small or has an inproper surface smoothness to be scanned.

In this case I recommend to use the very sophisticated color scanning device that you already have at hand - your digital camera. The best to use is a DSLR where you can export raw (unoptimized) images and have a manual white balance. Take a shot in sunlight or at least daylight with a white background and export the raw image. Now search for a spot on the original and the new paint which have no surface imperfections or interfering spots or dirt and cut this areas.

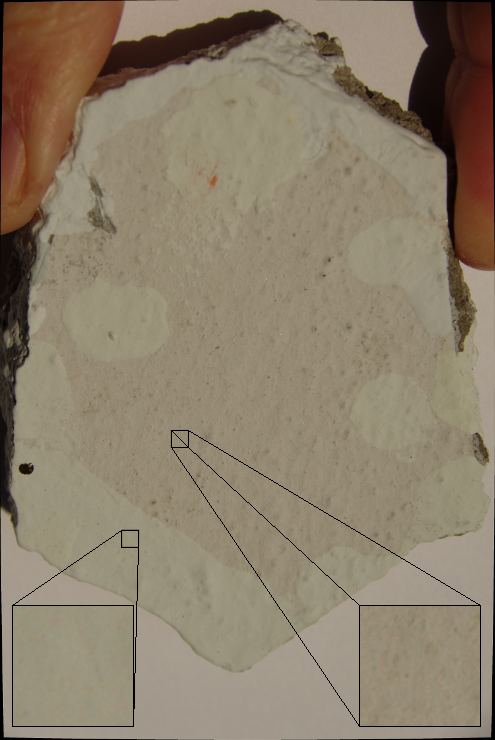
Here I used 120x120 pixel squares from the newly mixed paint (left) and the original paint (right) and egalized the pixels (e.g. by the "Smudge" tool of Gimp). This should give you two squares of constant color tone. To get an idea of which basic colors are missing, or if your mixture is to dark or too bright, you can now read out the RGB-values of There squares (e.g. with the color-picker-tool in Gimp).

Since the smudge tool did not toally equalize the colors, I probed each square at 5 positions and averaged the color tones manually. In this example I measured RGB values of 155/148/125 for my color mixture and 150/139/116 for the original paint
You must now keep in mind that the RGB codes are in additive color mixing mode while the mixing of the paint usually occurs in subtractive mode (if you don't know what this means, look it up). 

The green and blue values are 9 points different while red is only 5 points off. Adding red in subtractive color mixing filters out blue and green so I have to add more red than green or blue. The amount of color depends on the content of lake pigments in your base (white) varnish and the color additives so you might start with only small modifications. I added R:G:B in portions of 2:1:1 in two steps and was rewarded with a very satisfiable result.
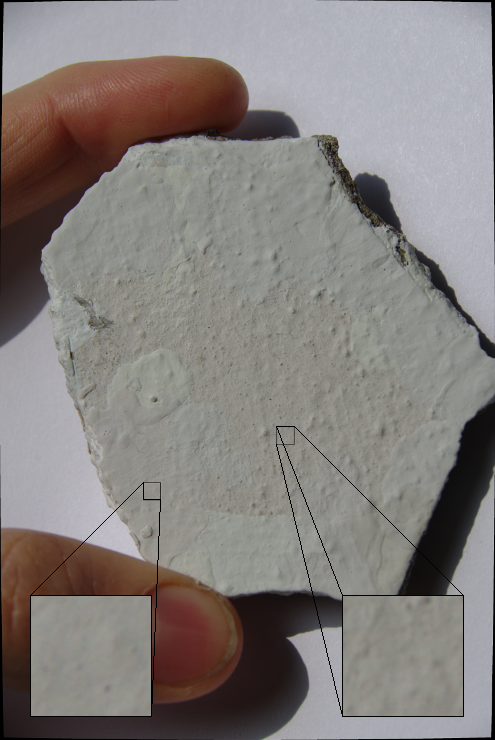
The next photos were taken with the corrected mixture on another day under different lighting, so the absolute values might vary to the ones of the first photos, but what counts is the differences in the same photo.
The RGB values indicate that the mixture is still too bright but the R/G/B proportion is almost the same.
For the untrained eye, these two color tones are already hard to distinguish, so the human eye seems to be
more sensitive to color differences than to changes in brightness. To my great luck I could already use this
first correction to repair my paint satisfiably.
I can recommend this procedure to anyone who has to mix mating color tones manually. It is important
to have a light source of even brightness and full color spectrum so I tend to use sunlight for this
purpose (available almost every day and constant enough).


[Back...]